Set Up your VoIP Phone
Connect your VoIP phone to the network. We recommend working with Yealink TX Series Phones. More on how to connect your phone here.
Once connected, from the phone go to Menu -> Status and check the IPv4 address given to your phone.
Use that IP address to access the phone’s configuration page from your browser. Get a detailed guide on how to access this page here.
Go to the Account tab and use the following image as a reference to configure your VoIP phone.
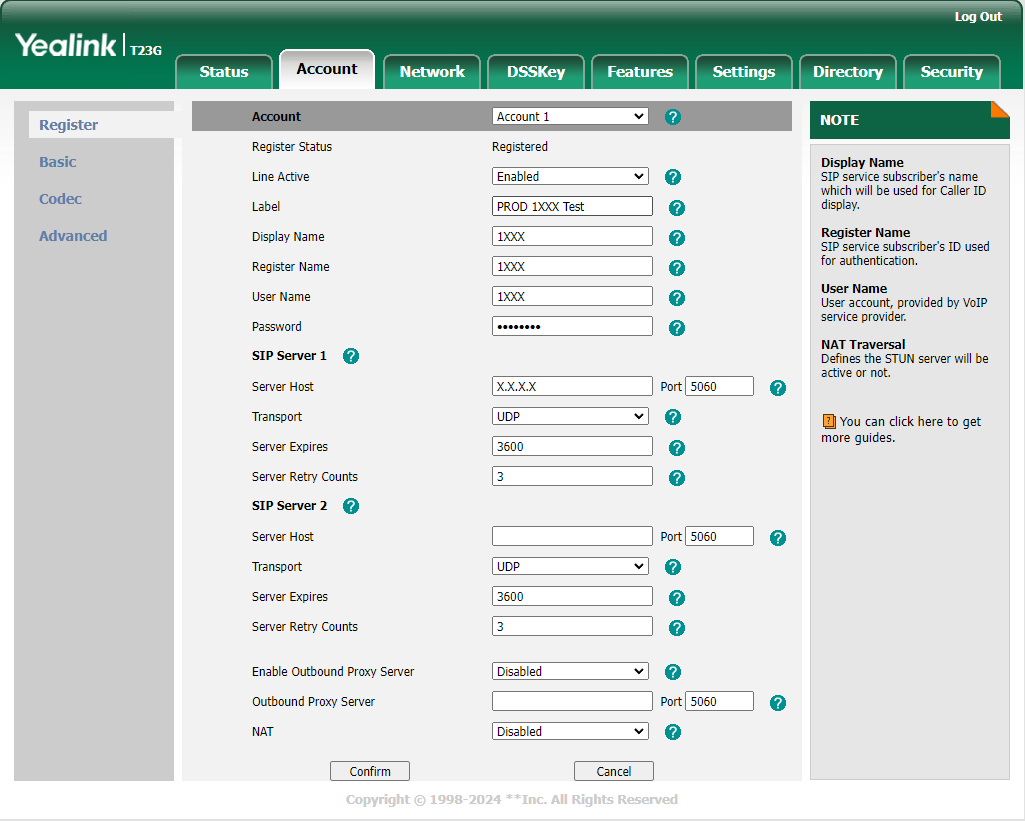
-
The
Display Name,Register NameandUser Nameare the extension number, which you previously configured for your agent in the Switchboard Cloud™ Interface. -
The Password is the one stored in the
ps_authsDB table, for your extension. -
The Server host is the IP address where your Asterisk® service is installed. In this example we use a local IP address, ideal for the case in which your VoIP phone is connected to your company’s local network, normally via a wired network connection.
Set Up a Soft Phone
You can choose between the different brands of Softphones available on the market.
Microsip
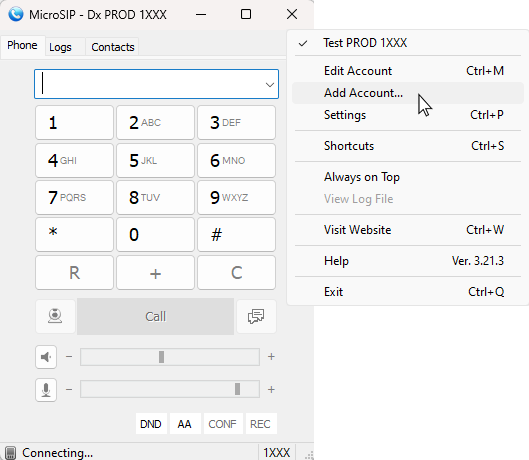
To use Microsip, an open source portable SIP softphone for Windows, based on PJSIP; you can go to the downloads on their website, and choose the version you want to install.Once the software has been downloaded and installed, go to the down arrow icon ->
Add account.
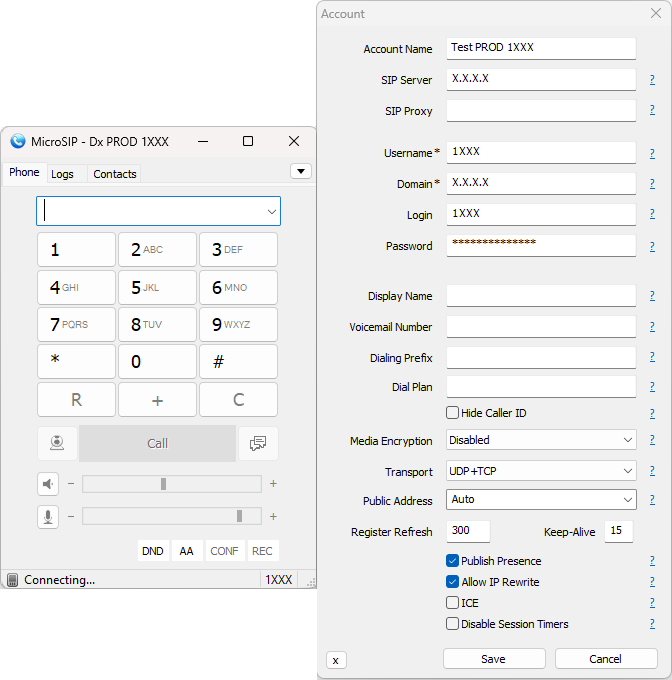
-
The
Account Nameis the name you want to give to the account, which is sufficiently explicit if you later have several accounts configured on your softphone. -
The
SIP ServerandDomainare the IP address, local or public, of the server where the Asterisk® service to which you want to connect your calls is installed (Or the IP address of the instance you launched from STARTcloud™). -
The
UsernameandLoginare the Extension number. Remember that in Switchboard Cloud™ an Agent can have more than one extension number. Make sure you choose the right one. -
The
Passwordis the one you configured for your VoIP extension. You can also find it stored in the ps_auths DB table, for your extension number.
Zoiper
If you decide to use Zoiper, you can go to their website and click onDownload, based on the operating system you use.
Once the software has been downloaded and installed, go to
Settings (gear icon) -> Accounts -> Add. Below is a reference image so you have an idea of how to configure your soft phone.
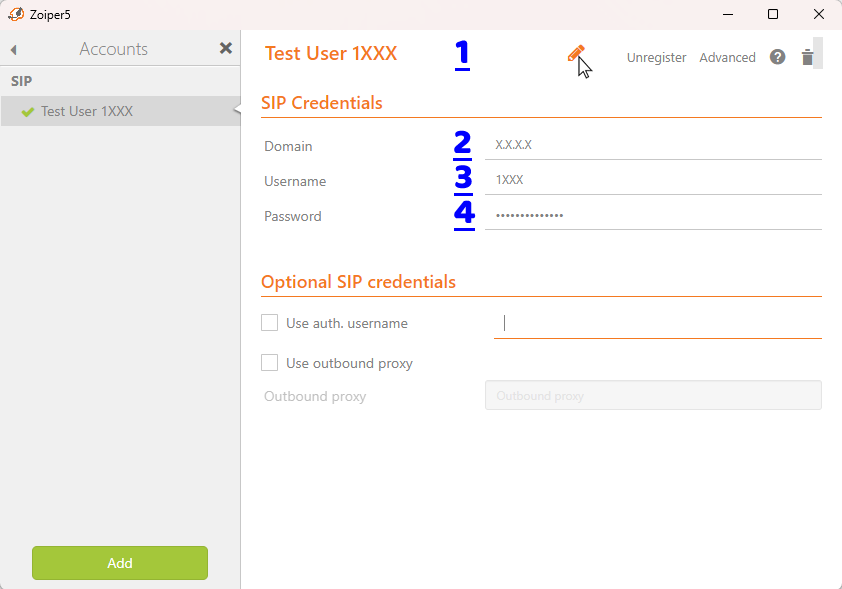
-
You can click the Pencil Icon at the top center to set an explicit
Account Name. -
The
Domainis the IP address of your server, where the Asterisk® service is installed (Or the IP address of the instance you launched from STARTcloud™). -
The
Usernameis the extension number, which you previously configured for your agent in the Switchboard Cloud™ Interface. -
The
Passwordis the one you configured for your VoIP extension. You can also find it stored in the ps_auths DB table, for your extension number. -
Click on Register.
3CX
If you decide to use 3CX, you can go to their website and click onGet started: Download the free softphone here.
Once the software has been downloaded and installed, go to
Set accounts, and then Create a wew account, using the New button. Below is a reference image so you have an idea of how to configure your soft phone.
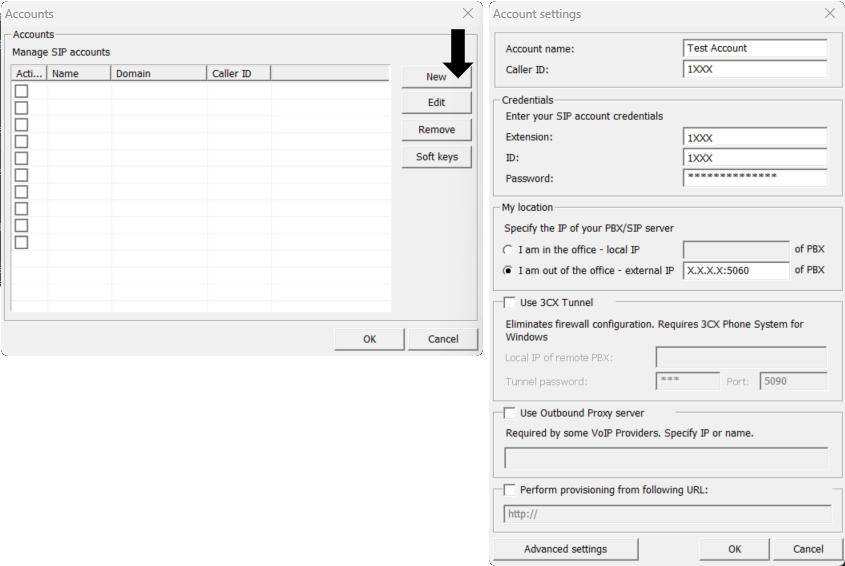
-
The
Account Nameis the name you want to give to the account, which is sufficiently explicit if you later have several accounts configured on your softphone. -
Note that the
Caller ID,ExtensionandIDare the extension number, which you previously configured for your agent in the Switchboard Cloud™ Interface. -
The
Passwordis the one configured for your VoIP extension. You can also find it stored in the ps_auths DB table, for your extension number. -
The external IP is the IP address of your server, where the Asterisk® service is installed (Or the IP address of the instance you launched from STARTcloud™). Include port 5060 in the IP address, as this is the one Asterisk® uses by default to communicate.


